Showing posts with label gluten-free. Show all posts

Monday, July 12, 2010

Delicious Dill Dip

Here's a recipe for a nummy all natural dill dip:

1 c sour cream
1 tsp dried dill weed
1/2 tsp garlic powder
1/2 tsp onion powder
1 tsp salt

Stir together. 


Devour.
If you try it and like it, consider making a batch of the dip powder at once.


Here's the quantities for a little jar of dip powder:

6 Tbsp dried dill weed
3 Tbsp garlic powder
3 Tbsp onion powder
6 Tbsp salt
Add up to 1 Tbsp of dip to 1 cup of sour cream and....devour.

Tuesday, July 6, 2010

Num Num Black Bean Dip

Another slam dunk recipe from "Honest Pretzels":


2-15 oz cans black beans, drained and rinsed (or 3 cups)
Juice of 2 limes
1 tsp minced garlic
1/2 tsp cumin
1 Tbsp salt
1/2 c tomato juice/V8
chopped cilantro

Put beans, tomato juice, garlic, cumin, salt, and lime juice into food processor and blend until smooth. 

Serve with corn chips/pita wedges/tortillas/veggies and sprinkle cilantro on top for flavor.

Tuesday, June 15, 2010

Homemade Yogurt... it's not as hard as it seems


Homemade yogurt sounds like one of those intimidating things that you need special skills and a "yogurt maker" for.  I have a recipe that is nice and simple and you can do it without a bunch of special anything!

Here are the supplies and ingredients that you will need:

-1 quart whole milk (recipe calls for non-homogenized but I don't know if that's necessary)

-1/2 c good quality commercial plain yogurt

-candy thermometer


Heat the milk to 180 degrees on the stove.  A double boiler is recommended but I don't have one and we do fine without it.  I set the burner to med-high and check the milk's temperature every 5 minutes until it reaches 180.

Pull the milk off the stove and let it cool until it reaches 110 degrees.  This can take a while.  I would check the temperature every twenty minutes or so until it reaches 110.  Once it gets to 110 put in the yogurt and whisk.  (Don't rush this step, if you put in the yogurt when it's above 110 you could kill the enzymes and you won't get good yogurt.)


Next, place the yogurt in a shallow glass, enamel, or stainless steel container.  Cover the container and place in a warm oven (a gas oven with a pilot light or electirc oven pre-heated to warm and then turned off) overnight. 


In the morning, transfer to the refrigerator.

Saturday, June 12, 2010

A Bread Miracle!

Bette Hagman is a genius.


I have a daughter who is sensitive to gluten.  She doesn't have celiac disease but she does have a disorder that causes her to react to gluten.  Once we became aware of the fact that our daughter can't have gluten we have provided her with gluten-free alternatives.  For bread she eats rice bread.  She may also be sensitive to artificial ingredients, so we have a very limited selection of rice breads that we can buy for her...basically ONE brand of bread which has all natural ingredients.  The bread is okay as toast or fried on a griddle, but it's not great.  I have wanted to give her bread that she can really enjoy eating and thanks to Bette Hagman, tonight I was able to do just that.

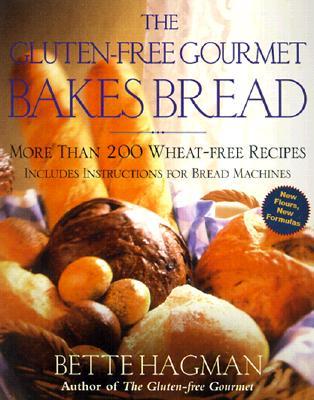
Bette Hagman has written an entire cookbook on gluten-free breads.  I have tried my first recipe tonight and it knocks the socks off any homemade white bread I would ever imagine eating.  It was so delicious I was actually a little jealous that she would be getting this all the time while we are stuck eating regular wheat bread!  (Yes, we could all eat her bread, but it's more expensive than wheat so I'll save it just for her...most of the time!)

Here's the cookbook:


The recipe that I started out with is her "Basic Bread".  The ingredient list is far from "basic" let me tell you.  Here's all the ingredients in one place:


Let me tell you what's in this loaf:
-sugar
-egg replacer
-garfava flour
-sorghum flour
-xanthan gum
-tapioca flour
-salt
-corn starch
-apple cider vinegar
-yeast
-eggs
-butter
(and milk or water, your choice)

She has you make this "bread mix"...like that "Make-A-Mix" cookbook from long ago.  I pre-measured pretty large quantities of most of those ingredients shown above and stirred them together in a giant bowl.  Then measured just a couple of cups of the "bread mix" into another bowl, added the remaining ingredients to it and whipped it up good in the blender, poured it into a bread pan, let it rise, baked it a while, and Voila!  A gluten-free bread miracle!

This isn't a great picture but here goes:


The slice looks weird because I spread it with butter to make it look more scrumptious but instead it just looks..."glumpy".  Can you see how "holey" it looks?  It's just the most tender delicious stuff ever.

Thank you Bette Hagman for all your hard work.  My daughter's life is better for it.