Showing posts with label recipe. Show all posts

Wednesday, July 28, 2010

The Three Hour Salad

The kitchen's been like an OVEN lately so I'm not real excited about serving anything hot so I thought, "Hey!  Salad is cool and quick!  I'll do that!"  I have this list of 25 main dish salads so I started at the very begining with Salad Nicoise.  That's right, it's French.  Be impressed.  I actually had to go to Wikipedia to figure out how to pronounce it.  It's "NI-swaz" in case you're wondering.  This salad is one of Julia Child's trademark recipes, apparently.  My recipe did not duplicate hers exactly, but it's a rough approximation I think. 

Here's a picture:


The ingredients for my simplified version are as follows:

Romaine lettuce
Grape tomatoes
Tiny red potatoes
Fresh green beans
Black olives
Hard boiled eggs
Tuna
Balsamic vinaigrette dressing

So, I read the recipe and it approximated 1-30 minutes for prep time.  That woman is a LIAR.  This sucker took 3 hours from start to finish!  (Now granted, I got distracted now and again, but still...)  Here's the lowdown on the flowdown:

So you scrub the potatoes and green beans, then you boil the eggs till hard and chill them.  You boil the potatoes until cooked but still firm and chill them.  You blanch the green beans (which means boil for 3 minutes then immerse in ice water), and wait a long time.   After everything is good and chilly, you wash and chop the lettuce, slice the tomatoes, peel the eggs, slice the eggs, slice the potatoes, cut up the green beans, drain the tuna, drain the olives, and make the dressing (yeah, I make my own...)

At this point, I was like, "This was more work than a full hot meal!!  What was I thinking?!?!"  I mean SERIOUSLY!  The kids kept coming up to me:  "Is it time to eat yet?"  "Can I have a piece of cheese?" 

Definitely a yummy salad that I would enjoy eating, but not so sure I'll make again...I just don't have three house to dedicate to making a salad.

Monday, July 12, 2010

Delicious Dill Dip

Here's a recipe for a nummy all natural dill dip:

1 c sour cream
1 tsp dried dill weed
1/2 tsp garlic powder
1/2 tsp onion powder
1 tsp salt

Stir together. 


Devour.
If you try it and like it, consider making a batch of the dip powder at once.


Here's the quantities for a little jar of dip powder:

6 Tbsp dried dill weed
3 Tbsp garlic powder
3 Tbsp onion powder
6 Tbsp salt
Add up to 1 Tbsp of dip to 1 cup of sour cream and....devour.

Wednesday, July 7, 2010

FAIL!

Ever heard of "Lacto-Fermented Vegetables"??  Neither have I.  But, they are an ancient and traditional way of preserving foods and a way to make them a nutritional powerhouse to boot.  My first attempt was "Gingered Carrots" and is pictured below:


So I don't have a wide-mouthed quart-sized canning jar like the instructions said so thought I'd use this old pickle jar instead.  Doesn't it look all bright and cheery?  See how I put the contrasting green and blue hot pad underneath to accentuate it's cheeriness?  I followed the instructions in my "Nourishing Traditions" cookbook to prepare the "Lacto Fermented" carrots and then set them on the counter for 3 days to let the whey do it's work on the carrots before refrigerating.

Well....I think I need to turn up a quart-sized canning jar.  One thing with "Lacto-Fermenting" anything is it's an air-tight operation.  No air is to come or go during the room temperature portion of the process.  I am going to conclude that pickle jars are not air-tight once they've been opened at home.  The first day on the counter-top, I thought I might want to make sure the lid was as tight as possible.  When I twisted it "righty-tighty" it let out a tiny hiss and I could smell a smell.  Not an unpleasant one mind you, but a smell nonetheless.  So I said to myself:  "Oops...I guess it wasn't air-tight.  Well, we'll see what happens."  The next day I would occasionally catch a "pickle-like" whiff when I was near the jar and by day three the whiff wasn't so nice and there was a foam growing on top of my pretty orange carrots.  Boo-hoo. 

So, I cranked the lid really righty-tighty which released a strong vapor and hissing sound and I promptly chucked it in the garbage.  I wonder if it will eventually blow it's top somewhere in "garbage land"?  Ew.

I'll let you know how my next attempt works out.  Stay tuned...

Tuesday, July 6, 2010

Num Num Black Bean Dip

Another slam dunk recipe from "Honest Pretzels":


2-15 oz cans black beans, drained and rinsed (or 3 cups)
Juice of 2 limes
1 tsp minced garlic
1/2 tsp cumin
1 Tbsp salt
1/2 c tomato juice/V8
chopped cilantro

Put beans, tomato juice, garlic, cumin, salt, and lime juice into food processor and blend until smooth. 

Serve with corn chips/pita wedges/tortillas/veggies and sprinkle cilantro on top for flavor.

Tuesday, June 15, 2010

Homemade Yogurt... it's not as hard as it seems


Homemade yogurt sounds like one of those intimidating things that you need special skills and a "yogurt maker" for.  I have a recipe that is nice and simple and you can do it without a bunch of special anything!

Here are the supplies and ingredients that you will need:

-1 quart whole milk (recipe calls for non-homogenized but I don't know if that's necessary)

-1/2 c good quality commercial plain yogurt

-candy thermometer


Heat the milk to 180 degrees on the stove.  A double boiler is recommended but I don't have one and we do fine without it.  I set the burner to med-high and check the milk's temperature every 5 minutes until it reaches 180.

Pull the milk off the stove and let it cool until it reaches 110 degrees.  This can take a while.  I would check the temperature every twenty minutes or so until it reaches 110.  Once it gets to 110 put in the yogurt and whisk.  (Don't rush this step, if you put in the yogurt when it's above 110 you could kill the enzymes and you won't get good yogurt.)


Next, place the yogurt in a shallow glass, enamel, or stainless steel container.  Cover the container and place in a warm oven (a gas oven with a pilot light or electirc oven pre-heated to warm and then turned off) overnight. 


In the morning, transfer to the refrigerator.

Saturday, June 12, 2010

A Bread Miracle!

Bette Hagman is a genius.


I have a daughter who is sensitive to gluten.  She doesn't have celiac disease but she does have a disorder that causes her to react to gluten.  Once we became aware of the fact that our daughter can't have gluten we have provided her with gluten-free alternatives.  For bread she eats rice bread.  She may also be sensitive to artificial ingredients, so we have a very limited selection of rice breads that we can buy for her...basically ONE brand of bread which has all natural ingredients.  The bread is okay as toast or fried on a griddle, but it's not great.  I have wanted to give her bread that she can really enjoy eating and thanks to Bette Hagman, tonight I was able to do just that.

Bette Hagman has written an entire cookbook on gluten-free breads.  I have tried my first recipe tonight and it knocks the socks off any homemade white bread I would ever imagine eating.  It was so delicious I was actually a little jealous that she would be getting this all the time while we are stuck eating regular wheat bread!  (Yes, we could all eat her bread, but it's more expensive than wheat so I'll save it just for her...most of the time!)

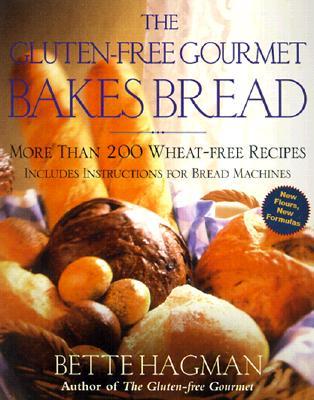
Here's the cookbook:


The recipe that I started out with is her "Basic Bread".  The ingredient list is far from "basic" let me tell you.  Here's all the ingredients in one place:


Let me tell you what's in this loaf:
-sugar
-egg replacer
-garfava flour
-sorghum flour
-xanthan gum
-tapioca flour
-salt
-corn starch
-apple cider vinegar
-yeast
-eggs
-butter
(and milk or water, your choice)

She has you make this "bread mix"...like that "Make-A-Mix" cookbook from long ago.  I pre-measured pretty large quantities of most of those ingredients shown above and stirred them together in a giant bowl.  Then measured just a couple of cups of the "bread mix" into another bowl, added the remaining ingredients to it and whipped it up good in the blender, poured it into a bread pan, let it rise, baked it a while, and Voila!  A gluten-free bread miracle!

This isn't a great picture but here goes:


The slice looks weird because I spread it with butter to make it look more scrumptious but instead it just looks..."glumpy".  Can you see how "holey" it looks?  It's just the most tender delicious stuff ever.

Thank you Bette Hagman for all your hard work.  My daughter's life is better for it.


Honest Pretzels


I'm trying to feed my family better.  My goal is organic meats and veggies, pastured milk, no artificial anything.  That makes for expensive eating...especially compared to what we were paying for food before.  We ate the processed foods that were cheap:  hot dogs, mac n cheese, frozen pizza.  We have a tight budget so every dollar counts. 

One idea I had to increase health while keeping spending down was to cook some meals vegetarian.  One of the most famous vegetarian cookbook authors is Mollie Katzen.  She authored the Moosewood Cookbook.  If you want to cook vegetarian, she's the one to go to I guess.  Anyhow, never having been a vegetarian cook I decided to go to her for some recipe ideas.  Easy recipe ideas.  Easy and cheap recipe ideas.  What I discovered was a cookbook she's written for kids called "Honest Pretzels".  Kid cooking I can do.

So far every recipe I've tried from there has been a home run.  It's all delicious! (Except maybe the tomato soup recipe...it seemed curdled and not smooth.  Blech.  But that may have been my fault because I may have let it cook too long with the milk in there.)  She does use white flour and sugar, but that's easy enough to sub out.  The kids love the food and so do us parents.

I do have a certain degree of guilt using this cookbook because I'm standing there alone doing the recipes instead of having quality time with one of my 4 daughters cooking together like the author intended.  I really stink at involving them in the cooking.  I'm working on improving in that area.

Here are some of our favorites from her cookbook:

-Yogurt Pancakes
-Grilled Cheese and Broccoli Sandwich
-Cream Cheese and Apricot Sandwich
-Apple Yogurt Salad
-Guacamole
-Creamy Corn Soup

Homemade Hashbrowns


Store-bought hashbrowns have artificial ingredients added so we make our own.  Making hashbrowns is a great way to use up leftover cooked potatoes.  How often have you tossed leftover potatoes because they're too much of a pain to reheat and aren't as good the second time anyhow.  When you turn them into hashbrowns, it's like eating for free!

What you'll need:

-leftover baked or boiled potatoes
-onion
-olive oil/butter/bacon drippings
-salt and pepper

 Here's the basic rundown: take leftover baked or boiled potatoes and grate them.  Grate an onion and get your griddle nice and hot.  Generously coat the griddle with the fat of your choice (if olive oil, don't heat the griddle as high), sprinkle on the potatoes, then the onions, then salt and pepper.  Seperate them into squares that will be easy to flip with your spatula.  Let 'em sit and sizzle for a while until nice and brown on one side, then flip them and fry the other.

As you can see, I left a gap for eggs.  I'll throw eggs on the griddle close to when the hashbrowns are done.

One little thing, if you want to prepare potatoes exclusively for hashbrowns the next morning, here's what I've found works the best...but I'm not a cook, so take this with a grain of salt:  cut up and put the potatoes in a pot of water and heat to boiling.  Once it begins to boil, shut off the burner and go to bed.  In the morning, drain them and pat them dry and you'll have nice hashbrown-ready potatoes.

Wednesday, June 9, 2010

Yummy Healthy Chili

We made some yummy chili tonight and wanted to pass on the recipe. This will make a nice, big pot and served the 6 of us with some to spare. We would have had more to spare but we were famished since I couldn't get dinner on the table until 8 pm and there was no butter for making cornbread so all we had to go with it was the blop of sour cream you see in the picture and some corn chips I had on hand....so, we really snarfed up the chili.
2 Tbsp olive oil
3 c onion, diced
1 green pepper, diced
2 c celery, diced
4 cloves garlic
1 lb ground beef
2-28 oz cans diced tomateos
4-6 Tbsp chili powder
2 1/2 c water
1 tsp cumin
2 tsp salt
4 tsp honey
3 cans undrained kidney beans (or other beans)

Saute onions, green pepper, celery, and garlic in olive oil. Brown beef. Stir it all together and simmer on low for two hours, stirring occasionally.